import sqlite3
from dash import Dash, html, dcc, Input, Output, State
import dash_bootstrap_components as dbc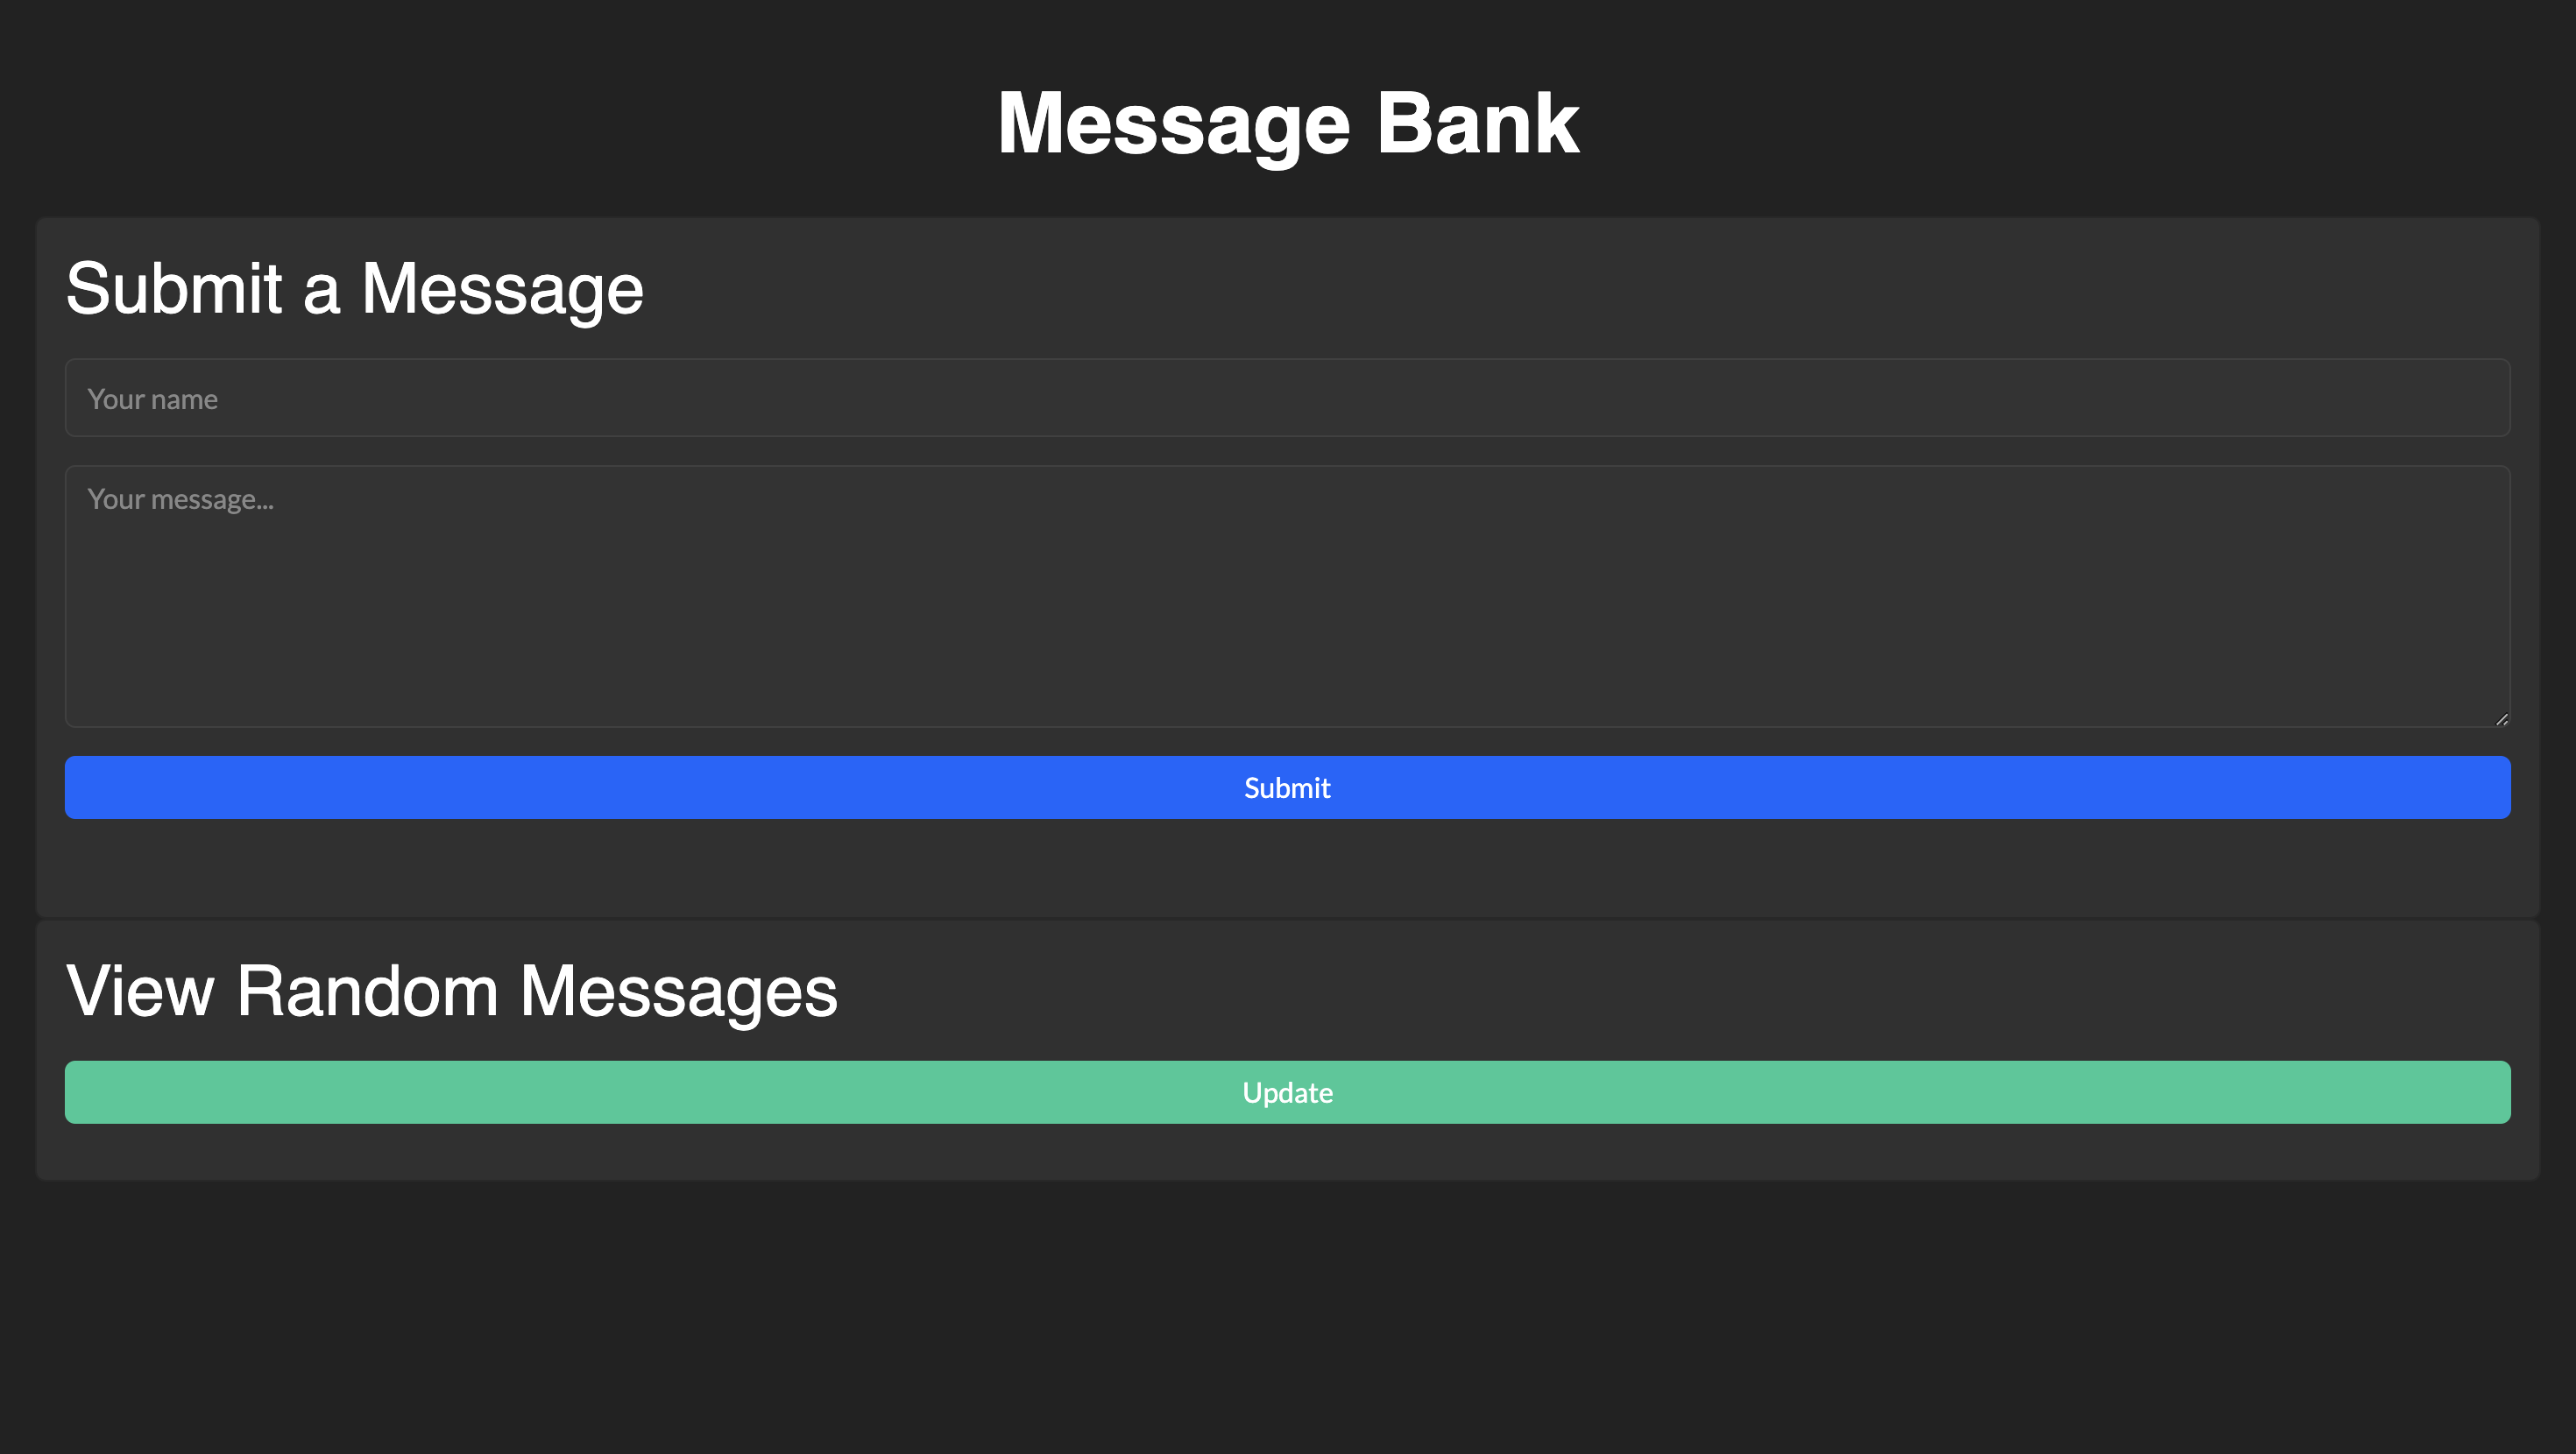
Introduction
Dash is a Python framework for building web applications using Flask, Plotly, and React. It enables developers to create interactive web apps with minimal front-end knowledge, making it a great choice for data-driven applications. We will work through the process of building a simple message bank web app using Dash and SQLite. This app will allow users to submit and view messages dynamically through an interactive interface.
Getting Started…
Before creating our web app, we must import the necessary packages and initialize the app.
Importing Necessary Packages
We’ll import the following packages for our web app:
How the packages will be used:
sqlite3: Handles database operationsDash: Creates the web applicationhtml,dcc: Build UI componentsInput,Output,State: Used for Dash callbacksdbc (Dash Bootstrap Components): Provides pre-styled UI components
Set Global Styling (Dark Mode)
We’ll build a web app with a dark theme, so we need to set our custom global CSS styling. We can do so by running:
# Custom CSS for additional styling
custom_css = {
    'dark-card': {
        'backgroundColor': '#2a2a2a', # Hex Color code
        'border': '1px solid #404040',
        'borderRadius': '15px',
        'boxShadow': '0 4px 8px 0 rgba(0,0,0,0.2)'
    },
    'input-style': {
        'backgroundColor': '#333333',
        'color': 'white',
        'border': '1px solid #404040'
    },
    'message-card': {
        'backgroundColor': '#1e1e1e',
        'border': '1px solid #404040',
        'borderRadius': '10px'
    }
}
Initializing Our Web App
We’ll initialize the Dash app by running:
# Initialize the app
app = Dash(__name__, external_stylesheets=[dbc.themes.DARKLY])
app.title = "Message Bank"
Running the code above does the following:
- Initializes the Dash application
- Loads Bootstrap styling (DARKLY for dark theme)
- Sets the page title
Defining the App Layout
We’ll begin defining the app layout by running the following:
# App layout with dark theme
app.layout = dbc.Container(fluid=True, style={'padding': '20px'}, children=[
    html.Div([
        html.H1("Message Bank", # Create app title block
                className="text-center mt-4 mb-4",
                style={'color': '#6f42c1', 'fontWeight': 'bold'}),
    ], style={'backgroundColor': 'transparent', 'color': '#ffffff',
              'fontFamily': 'Roboto, sans-serif'}), # Change color (hex code) and font
The code includes:
dbc.Container(fluid=True)creates a full responsive layout.childrenwill include all the features we add.html.H1()displays the title “Message Bank.”stylecontains the color information for the title.
We’ll add more to this code block as we add the layout for the submission and viewing features.
Setting Up the Submission System…
In this section we will set up the submission system so that users will be able to to enter a name or user and a message and submit. By hitting submit, the name and message will be added to the message_db database so that later they can be retrieved in the view section. All of this functionality will be wrapped in a user-friendly UI.
Creating the UI for Submitting Messages
Before handling the database and necessary functions, we’ll first create the input form where users will submit their messages.
We’ll add the code for creating the submission UI into app.layout as another child:
# App layout with dark theme
app.layout = dbc.Container(fluid=True, style={'padding': '20px'}, children=[
    html.Div([
        html.H1("Message Bank", # Create app title block
                className="text-center mt-4 mb-4",
                style={'color': '#6f42c1', 'fontWeight': 'bold'}),
    ], style={'backgroundColor': 'transparent', 'color': '#ffffff',
              'fontFamily': 'Roboto, sans-serif'}), # Change color (hex code) and font

# New Code: ------------------------------------------------------------------

    # Submission Section
    dbc.Card(className="dark-card", children=[ # Submission has its own children
        dbc.CardBody(className="mb-4", children=[
            html.H2("Submit a Message", # Title for Submission UI
                    className="card-title mb-3",
                    style={'color': '#6f42c1'}), # Styling
            dcc.Input( # Creates input box for user-name
                id='handle-input',
                type='text',
                placeholder='Your name',
                className='mb-3 form-control',
                style={**custom_css['input-style'], 'height': '45px'} # Global CSS
            ),
            dcc.Textarea( # Creates message box
                id='message-input',
                placeholder='Your message...',
                className='mb-3 form-control',
                style={**custom_css['input-style'], 'height': '150px'}
            ),
            dbc.Button( # Creates submit button
                "Submit",
                id='submit-button',
                color="primary",
                className='mb-3 w-100',
                style={'backgroundColor': '#6f42c1', 'border': 'none'}
            ),
            html.Div(id='submit-confirmation') # Creates submission confirmation
        ])
    ]),
What dbc.Card code does:
- Creates a name input field
dcc.Input() - Creates a message input field
dcc.Textarea() - Adds a Submit button
dbc.Button() - Adds a confirmation message area
html.Div()
At this point, the UI is set up but does not store messages yet.
Creating the Database to Store Messages
Since we need to store user messages, we’ll use SQLite.
We can write a function def get_message_db() to initialize and return the SQLite database connection:
# Database setup
message_db = None

def get_message_db():
    # Retrieve or create the message database.
    global message_db
    if message_db:
        return message_db
    else:
        message_db = sqlite3.connect("messages_db.sqlite", check_same_thread=False)
        cmd = """
            CREATE TABLE IF NOT EXISTS messages
            (handle TEXT, message TEXT)
        """
        # Creates table if not existing
        # Queries for user handle & message
        cursor = message_db.cursor()
        cursor.execute(cmd)
        message_db.commit()
        return message_db
What the function does:
- Connects to
messages_db.sqlite - Creates a messages table (if it doesn’t exist) with:
1.handle: user’s name
2.message: user’s message
Writing a Function to Insert Messages
Now that we have a database, we need to store user messages.
We can write a function def insert_message() to insert a new message into the database:
def insert_message(handle, message):
    db = get_message_db()
    cursor = db.cursor()
    # Don't use f-string.
    # Use parameterized queries (?, ?) to prevent SQL injection & handle special characters
    cursor.execute("INSERT INTO messages (handle, message) VALUES (?, ?)", (handle, message))
    db.commit()
    db.close()
    global message_db
    message_db = None
What the function does:
- Saves the user’s name:
handleand message:messageinto the database. - Uses parameterized queries
?to prevent SQL injection.
Connecting the UI to the Database (Submit Callback)
Now, we need to connect the Submit button to the insert function so that user input is stored when they click the button.
We’ll write a callback @app.callback and function def submit() to handle this:
@app.callback(
    Output('submit-confirmation', 'children'), # Updates the confirmation message div
    Input('submit-button', 'n_clicks'), # Triggered when the submit button is clicked
    State('handle-input', 'value'), # Value from the handle input field
    State('message-input', 'value'), # Value from the message input field
    prevent_initial_call=True # Prevents the callback from running on app startup
)
def submit(n_clicks, handle, message):
    # Ensures both handle and message are provided and not empty
    if not handle or not message or handle.strip() == '' or message.strip() == '':
        return dbc.Alert("Please enter both a name and a message.", color="danger")

    # Insert the message into the database
    insert_message(handle.strip(), message.strip())

    # Return a success message and thanks the user
    return dbc.Alert("Message submitted successfully! Thank you!", color="success")
What the callback and function does:
- Retrieves user input (
handle,message). - Checks if input is empty.
- Calls
insert_message()to store data in the database. - Displays a success message in
submit-confirmation.
Viewing User Submissions…
In this section, we’ll set up the view system so that users can click “update” to view up to five previously submitted messages randomly selected. By clicking the button, the database will be queried to retrieve handles and messages and display them neatly. Like the submission section, we’ll start by establishing the UI, defining the functions, and connecting them.
Creating the UI to Display Messages
Now, we’ll create a user-interface for users to view messages. We’ll add another child to our existing app.layout:
# App layout with dark theme
app.layout = dbc.Container(fluid=True, style={'padding': '20px'}, children=[
    html.Div([
        html.H1("Message Bank", # Create app title block
                className="text-center mt-4 mb-4",
                style={'color': '#6f42c1', 'fontWeight': 'bold'}),
    ], style={'backgroundColor': 'transparent', 'color': '#ffffff',
              'fontFamily': 'Roboto, sans-serif'}), # Change color (hex code) and font

    # Submission Section
    dbc.Card(className="dark-card", children=[ # Submission has its own children
        dbc.CardBody(className="mb-4", children=[
            html.H2("Submit a Message", # Title for Submission UI
                    className="card-title mb-3",
                    style={'color': '#6f42c1'}), # Styling
            dcc.Input( # Creates input box for user-name
                id='handle-input',
                type='text',
                placeholder='Your name',
                className='mb-3 form-control',
                style={**custom_css['input-style'], 'height': '45px'} # Global CSS
            ),
            dcc.Textarea( # Creates message box
                id='message-input',
                placeholder='Your message...',
                className='mb-3 form-control',
                style={**custom_css['input-style'], 'height': '150px'}
            ),
            dbc.Button( # Creates submit button
                "Submit",
                id='submit-button',
                color="primary",
                className='mb-3 w-100',
                style={'backgroundColor': '#6f42c1', 'border': 'none'}
            ),
            html.Div(id='submit-confirmation') # Creates submission confirmation
        ])
    ]),

# New Code: ------------------------------------------------------------------

        # View Messages Section
        dbc.Card(className="dark-card", children=[
            dbc.CardBody([
                html.H2("View Random Messages", # Title of Viewing UI
                        className="card-title mb-3",
                        style={'color': '#ffffff', 'fontFamily': 'Roboto, sans-serif'}),
                dbc.Button( # Button to trigger random messages
                    "Update",
                    id='view-button',
                    color="info",
                    className='mb-3 w-100',
                    style={'backgroundColor': '#20c997', 'border': 'none'}
                ),
                html.Div(id='message-display') # Dynamically updated
            ])
        ])
    ])
What dbc.card does:
- Adds a button to refresh the displayed messages.
html.Div(id='message-display')will be populated dynamically.
Fetching Messages from the Database
Now, we’ll need a function to retrieve messages for display.
We can write a function def random_messages() to fetch up to n random messages from the database:
def random_messages(n=5): # Limit number to 5
    db = get_message_db()
    cursor = db.cursor()
    # Query function with f-string to pass n into query
    cursor.execute(f"SELECT handle, message FROM messages ORDER BY RANDOM() LIMIT {n}")
    messages = cursor.fetchall()
    db.close()
    global message_db
    message_db = None
    return messages
What this function does:
- Retrieves up to 5 messages randomly from the database.
- Ensures messages appear in a shuffled order.
Connecting the UI to the Database (View Callback)
Now, we’ll connect the View button to the random_messages() function.
We’ll write a callback @app.callback and function def view() to handle this:
@app.callback(
    Output('message-display', 'children'), # Updates the div to display messages
    Input('view-button', 'n_clicks'), # Triggered when the view button is clicked
    prevent_initial_call=True # Prevents the callback from running on app startup
)
def view(n_clicks):
    """Displays a random selection of messages."""
    # Fetch up to 5 random messages from the database
    messages = random_messages(5)

    # If no messages are found, display a placeholder message
    if not messages:
        return html.P("No messages to display.", style={'color': 'white'})

    # Create a list of styled cards for each message
    message_cards = []
    for handle, message in messages:
        card = dbc.Card(
            className="mb-3",
            style=custom_css['message-card'],  # Apply custom styling for the card
            children=[
                dbc.CardBody([
                    html.Blockquote(
                        className="blockquote mb-0",
                        children=[
                            # Display the message
                            html.P(message, style={'color': '#dee2e6'}),
                            html.Footer(
                                html.Small(
                                    # Display the handle
                                    html.I(f"— {handle}"),
                                    className="text-muted"
                                )
                            )
                        ]
                    )
                ])
            ]
        )
        message_cards.append(card)  # Add the card to the list

    # Return the list of message cards to be displayed
    return message_cards
What the callback and function does:
- Calls
random_messages()to fetch stored messages. - Displays each message in styled blockquotes.
Running the Web App
To run the app we need to write one last bit of code to prevent us from accidentally running the code mistakenly as well as defining the port our website will occupy:
# Run the app
if __name__ == '__main__':
    app.run_server(debug=False, port=8080) # Feel free to change port
In the terminal, after changing the directory to our project folder, we can run to launch the web app:
python <your filename>.py
We’ll get a local host link to open in our browser (private browser recommended). We should see something like the initial page shown in the beginning.
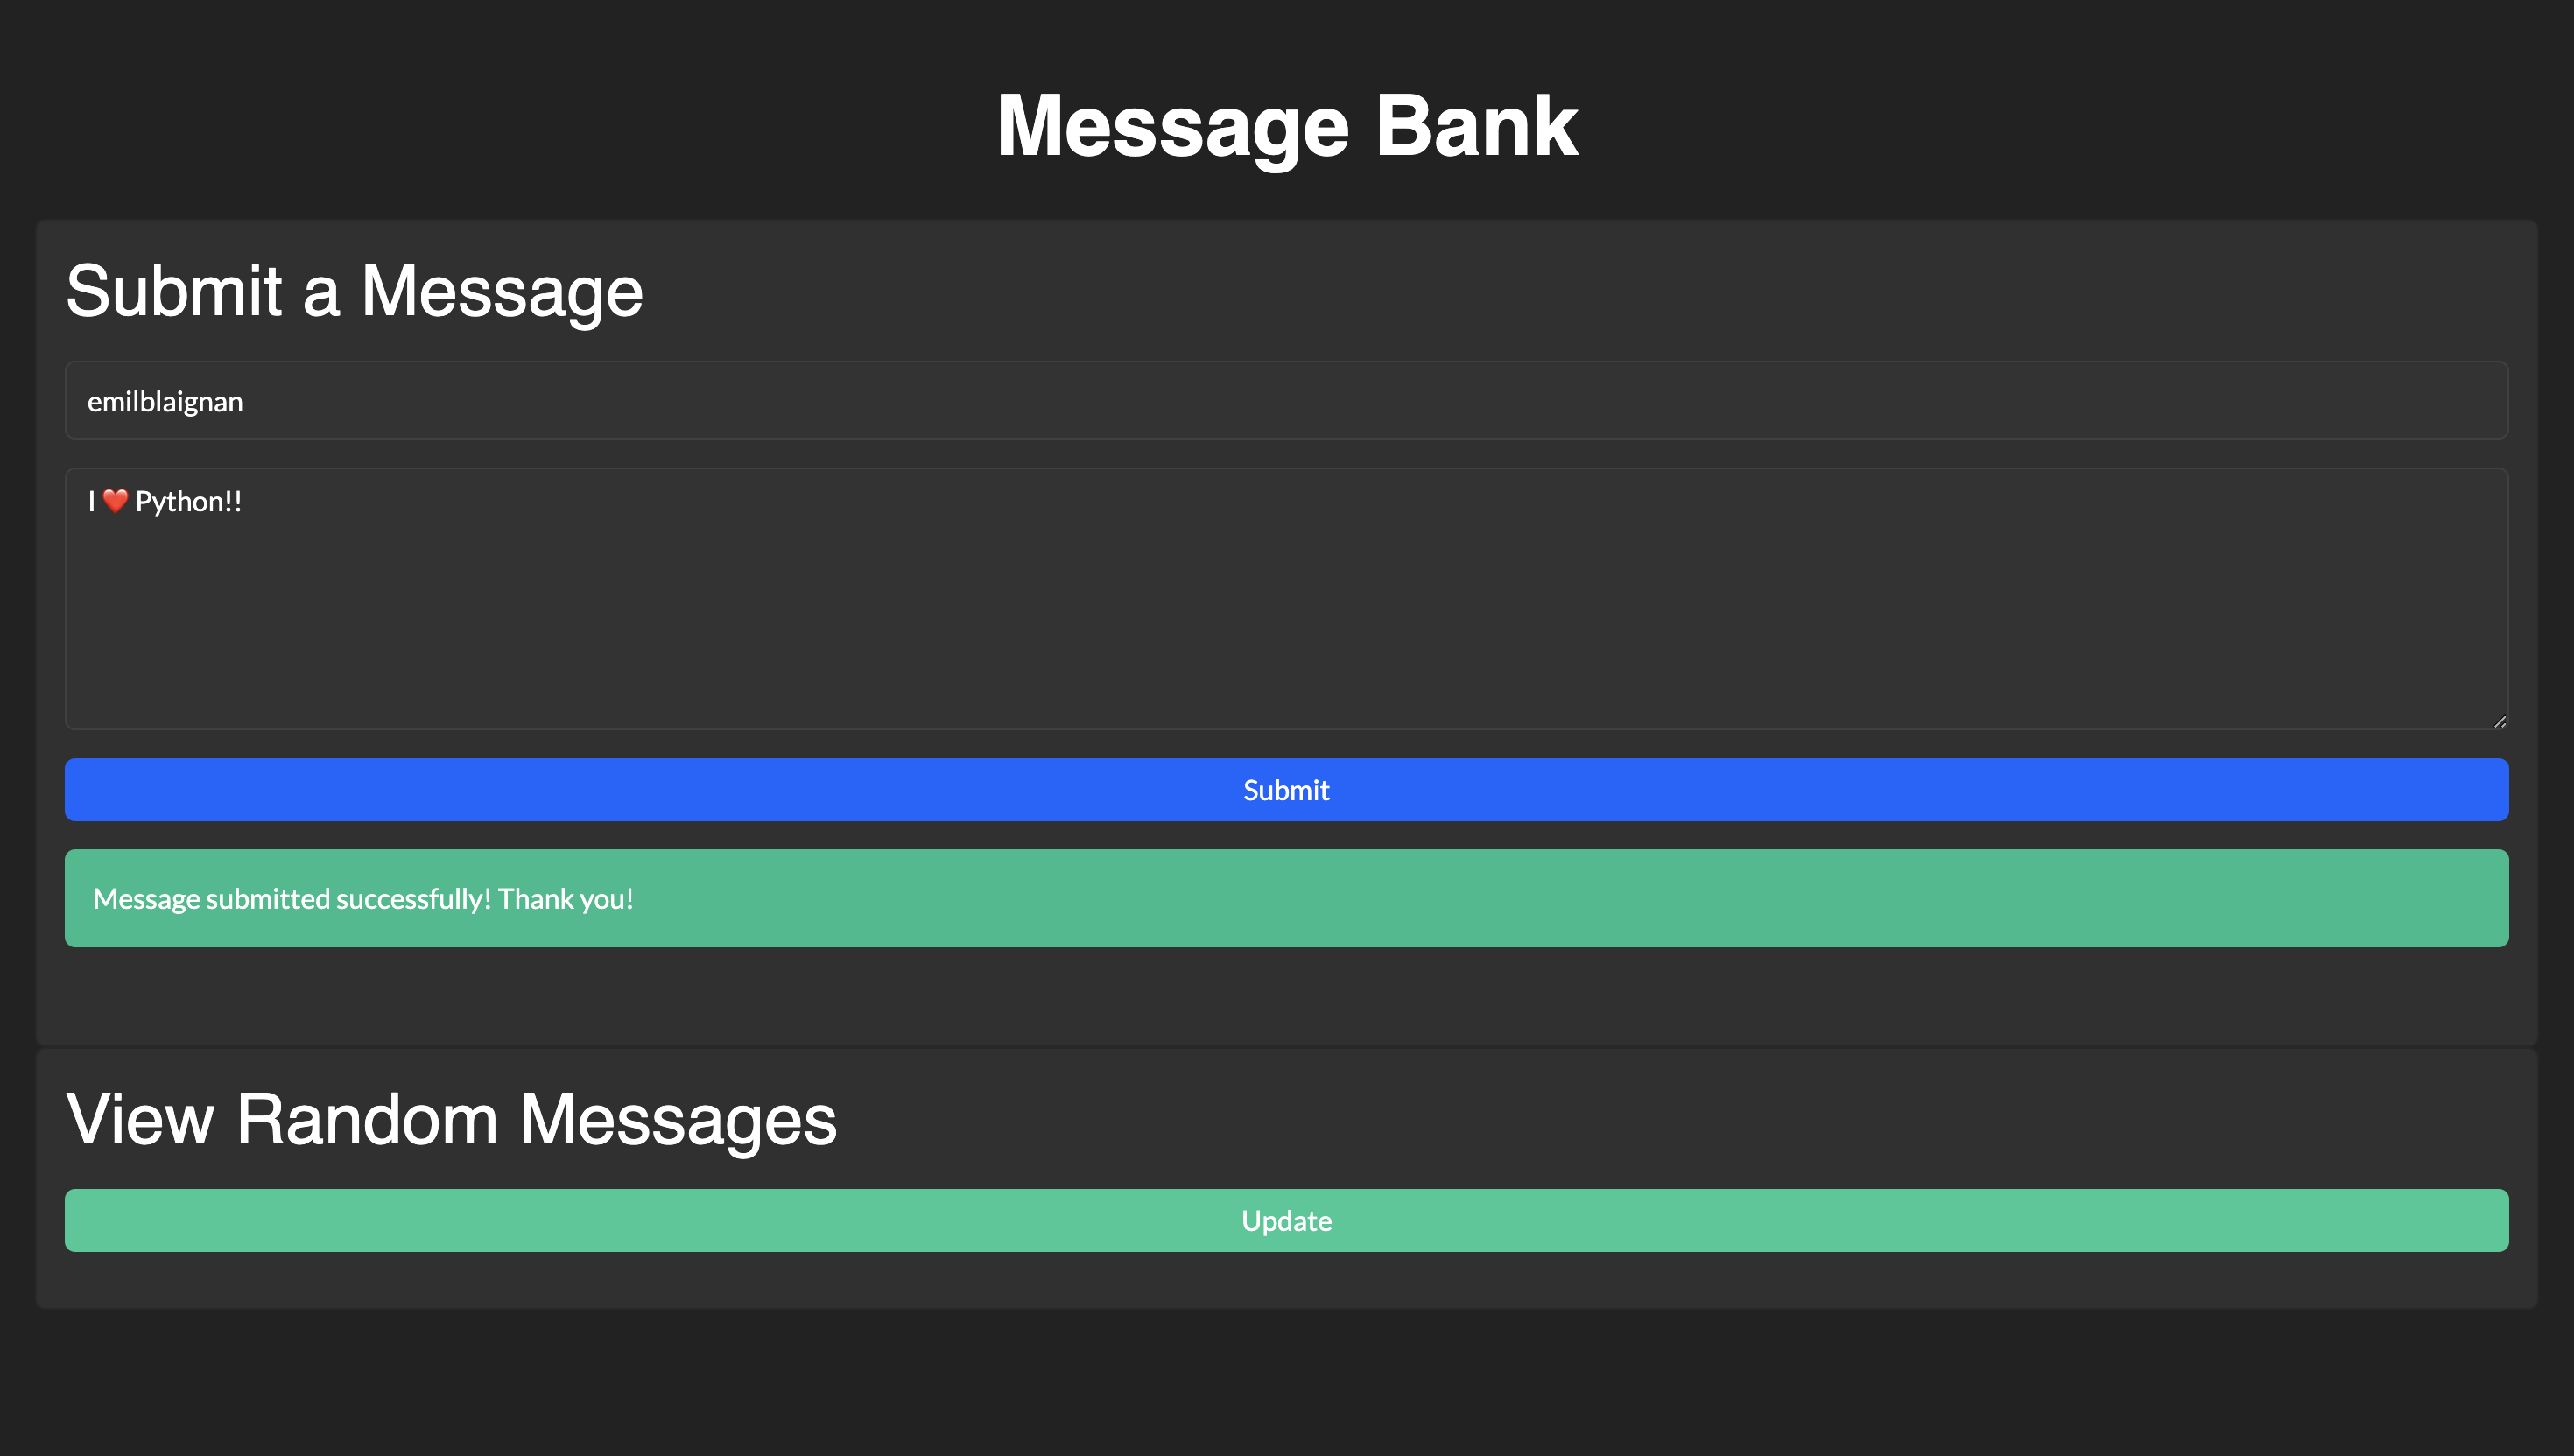
From here we can type in a name/message and submit as shown:
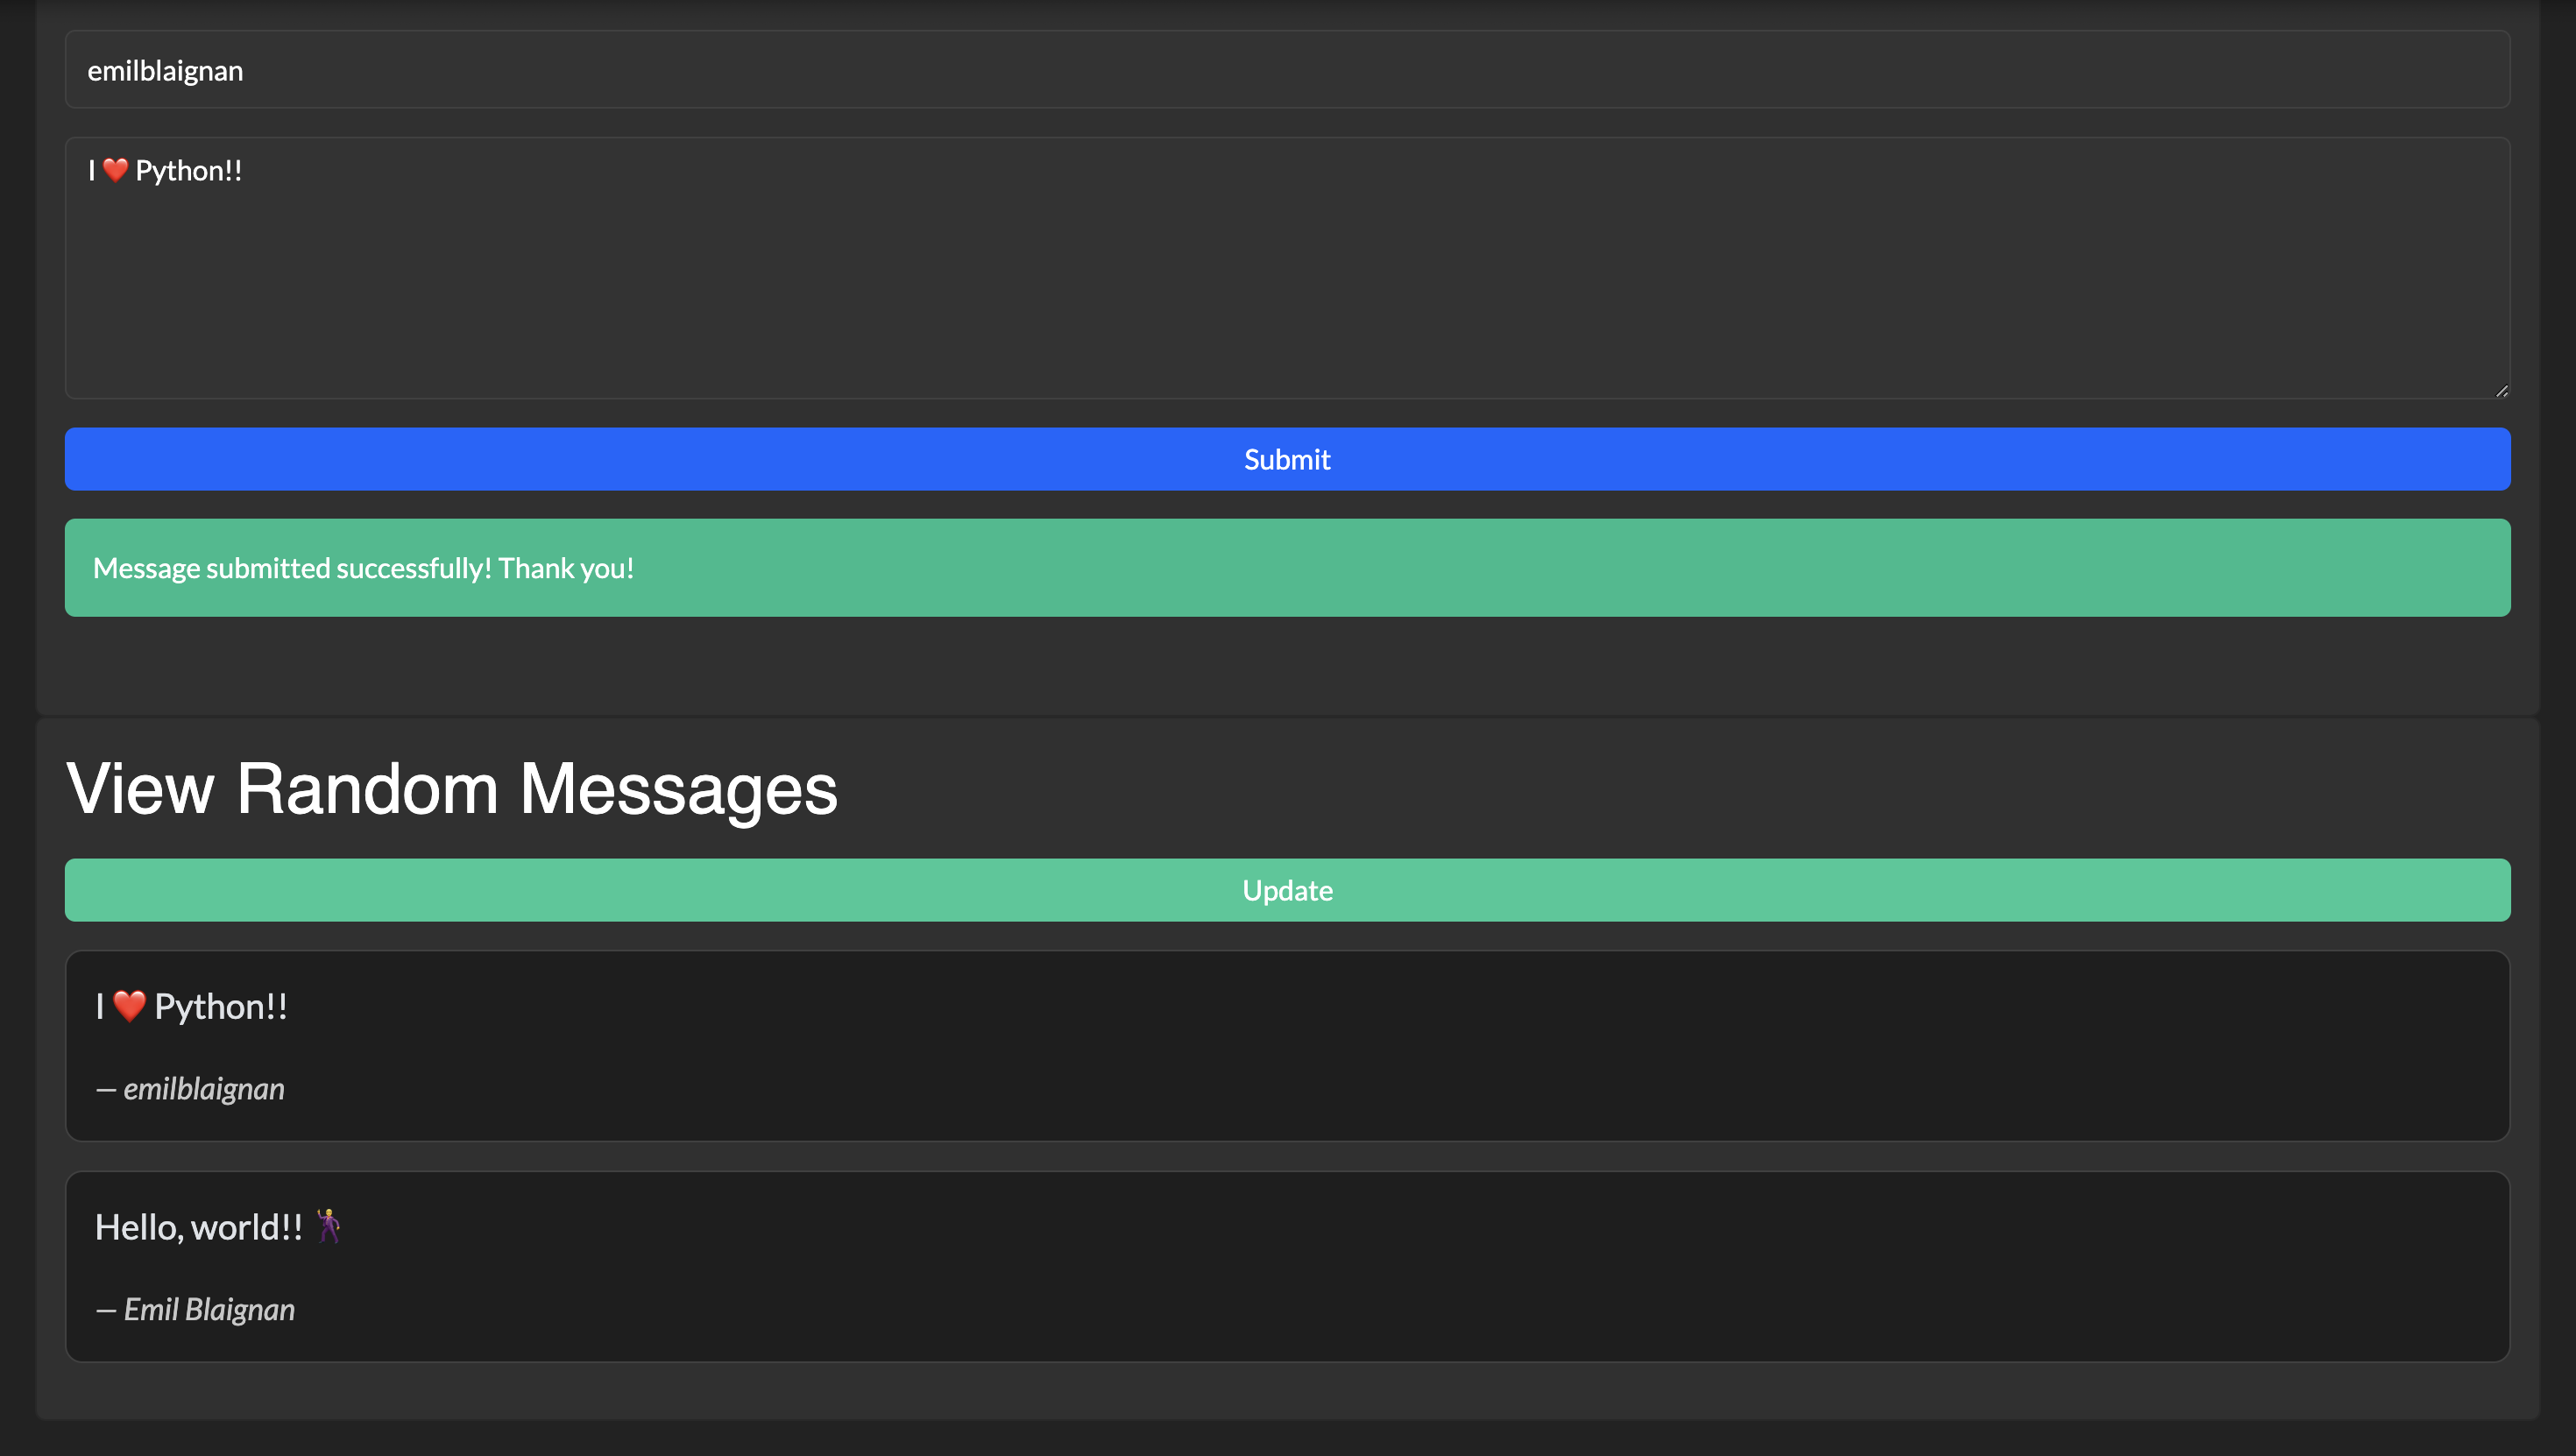
Clicking on the “Update” button should show previously submitted messages:
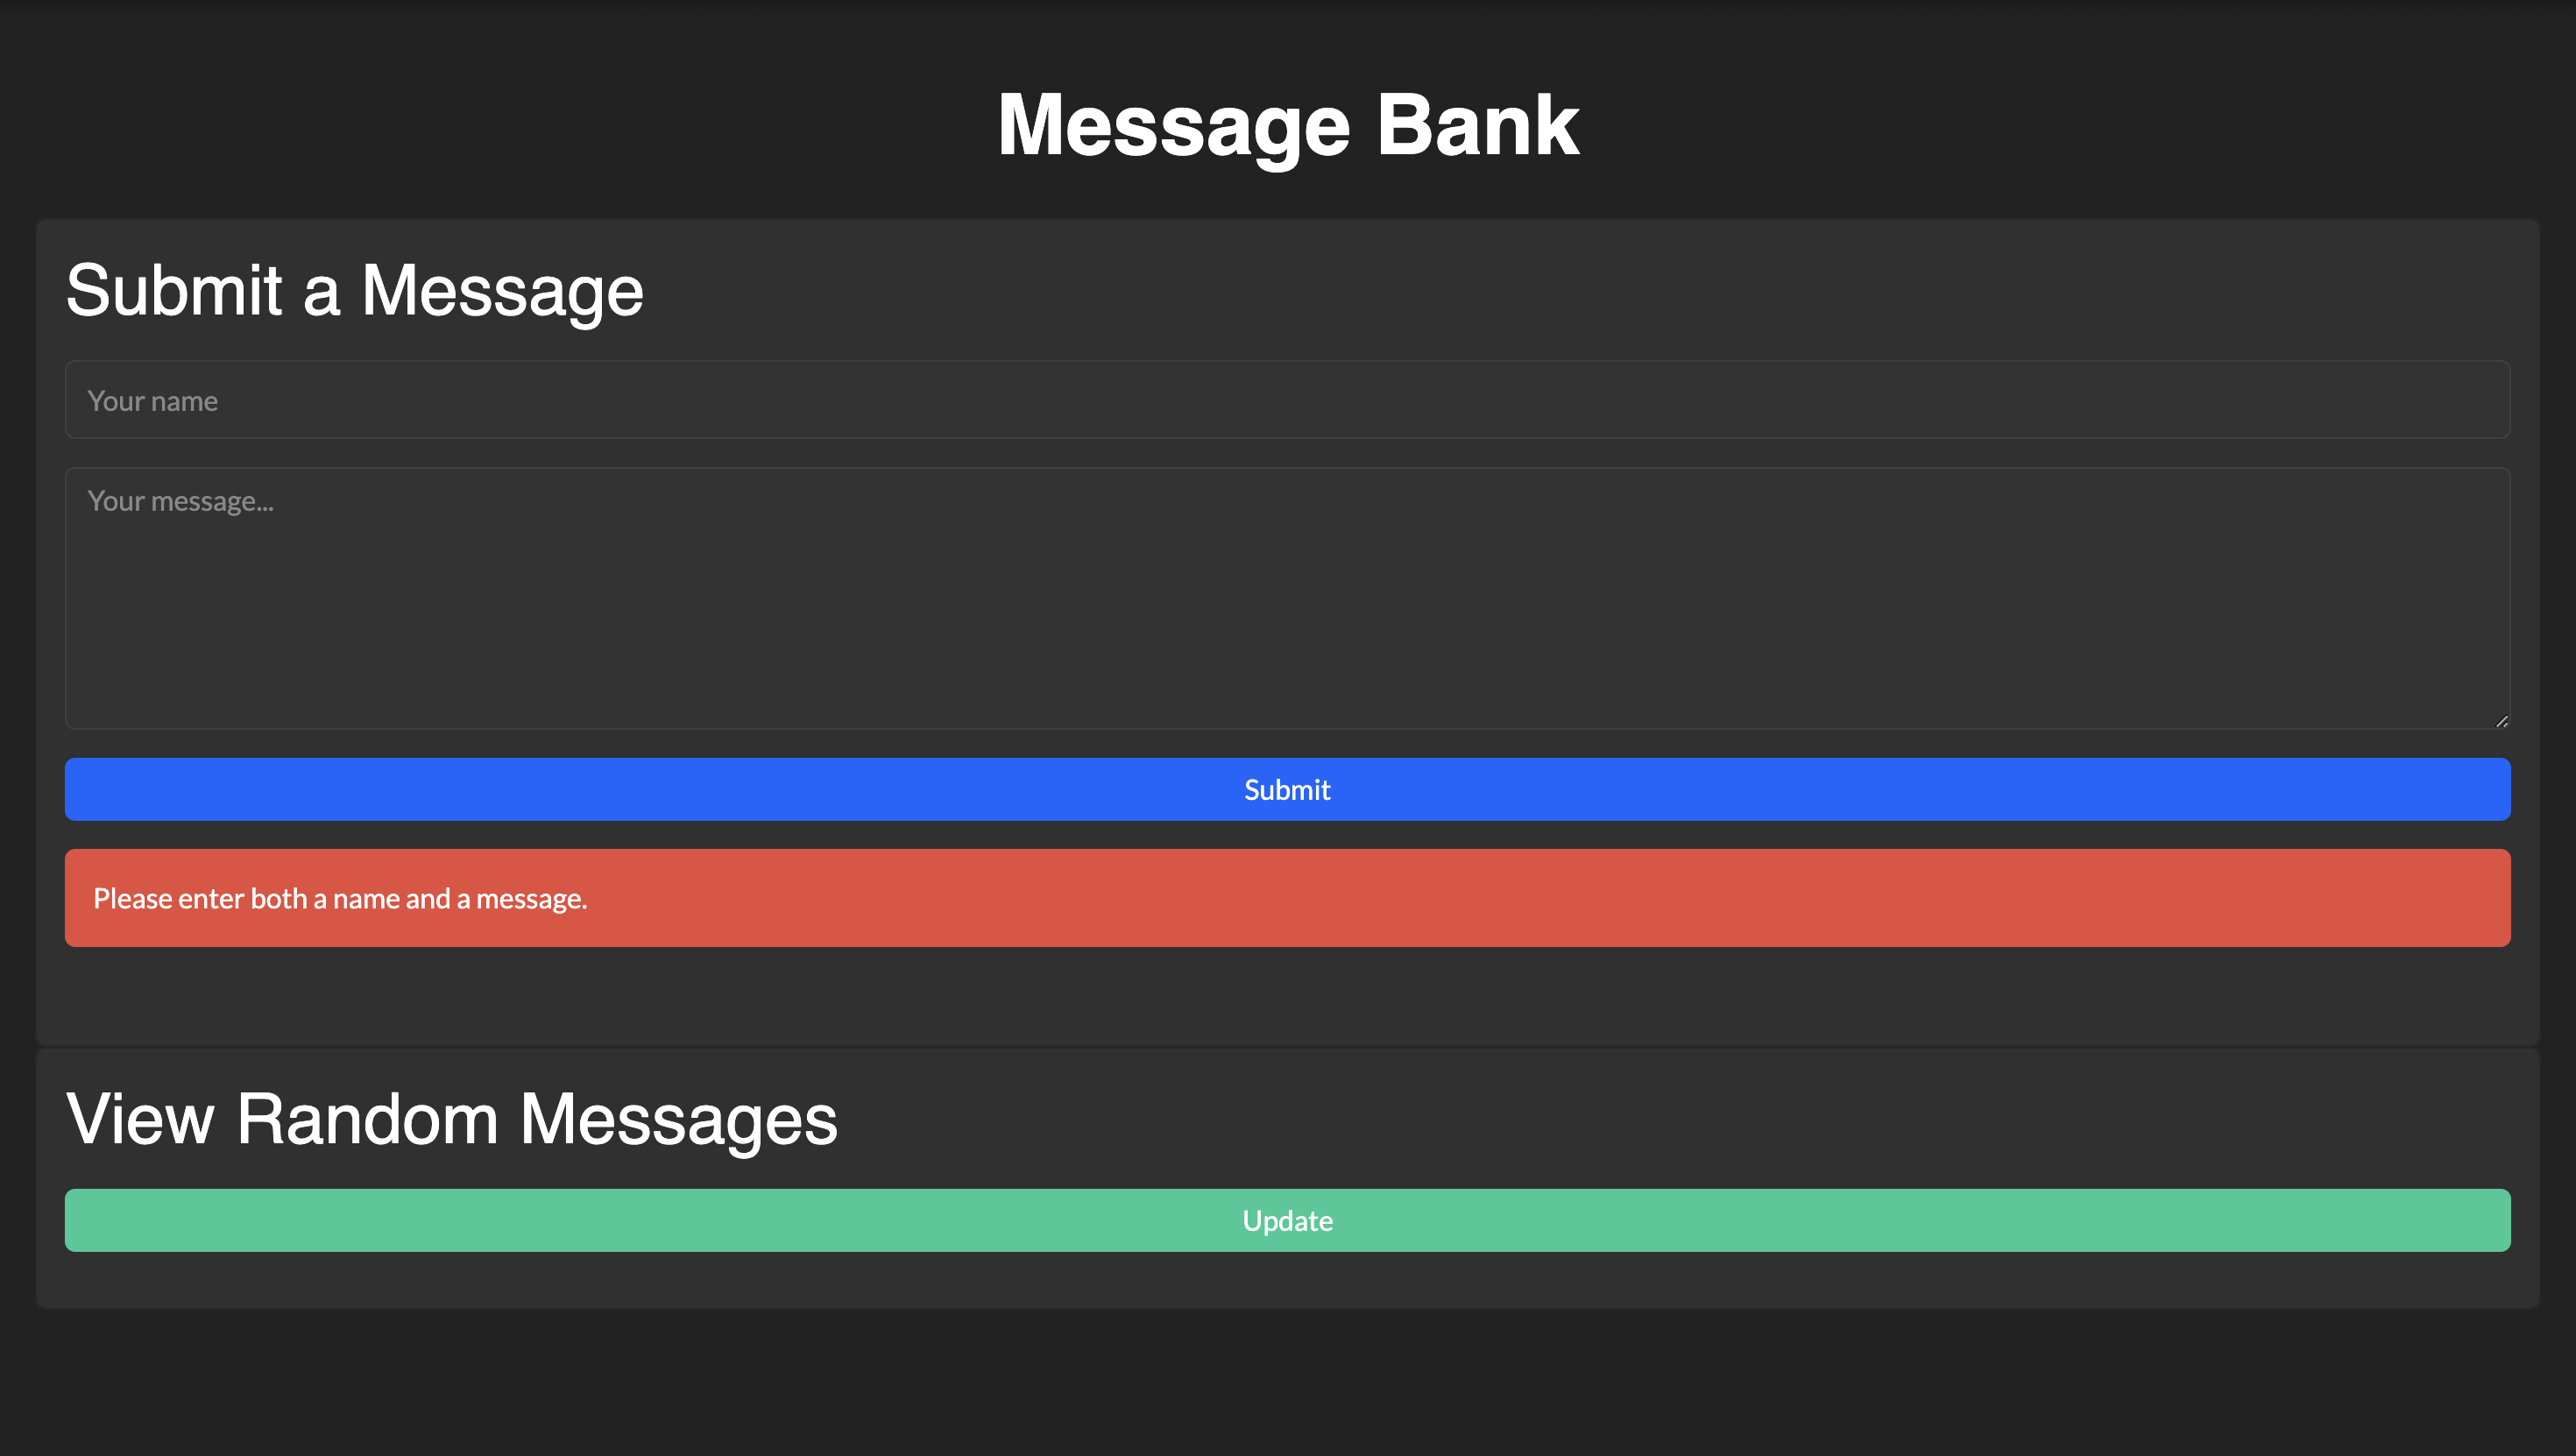
Additionally, when a user attempts to submit with either (or both) a missing handle/message, we should see the error message: